ikut step ini.
sudo rm -rf LCD-show
git clone https://github.com/goodtft/LCD-show.git
chmod -R 755 LCD-show
cd LCD-show/
sudo ./LCD35-show
sudo mkdir -p /etc/X11/xorg.conf.d
sudo cp ./usr/tft35a-overlay.dtb /boot/overlays/
sudo cp ./usr/tft35a-overlay.dtb /boot/overlays/tft35a.dtbo
sudo cp -rf ./usr/99-calibration.conf-35 /etc/X11/xorg.conf.d/99-calibration.conf
sudo cp -rf ./usr/99-fbturbo.conf /usr/share/X11/xorg.conf.d/
sudo cp ./usr/cmdline.txt /boot/
sudo cp ./usr/inittab /etc/
sudo cp ./boot/config-35.txt /boot/config.txt
sudo reboot
jika nak patah balik ke hdmi....
chmod -R 755 LCD-show
cd LCD-show/
sudo ./LCD-hdmi
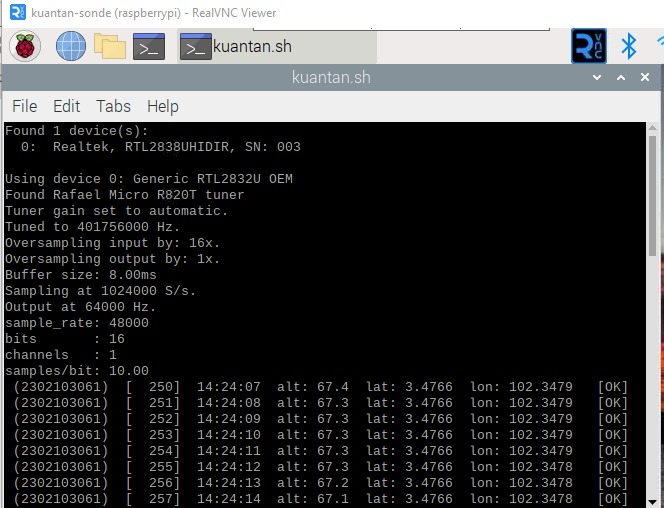
ini hasilnya